BREAKING NEWS
Showing posts with label Guides. Show all posts

Wednesday, March 30, 2016

6 Things you should know about the Mediah Release

With the release of Mediah later today, we thought it might be helpful to share a few things that may be useful to players unfamiliar with the new region. Please note that the information contained in this guide is based upon the Korean version of the game-there might be a few changes for the Western version. We will do our best to update the guide as quickly as possible if there any substantial changes made for the Western release.


Mediah itself is a huge update to the World of Black desert Online, adding roughly ⅓ more total area to the world map. With the new region, we will be receiving higher level mobs, making it much easier to reach level 55, and will allow for a newer or more casual player catch up with the more active players on the server that have grinded to the cap. While not confirmed, we believe the hard cap will either be raised or eliminated altogether with the Mediah update (although advancing past level 56 will be a very slow process).


Below are a list of 6 things that will change or be added with the Mediah update that will alter how you gear up or play the game.


Grunil Armor
Grunil Armor is a very flexible armor set that offers HP, an AP set bonus, and 2 Enhancement slots per piece. You can farm pieces by killing mobs in Mediah, purchase it through a vendor for about 100,000 silver and Amity in Altinova, or craft it (there are are armor workshops in both Glish and Calpheon you can purchase to create it). The bonuses make the armor extremely flexible, and for players that enjoy creating alts, the suit can be useful for just about any class. As for your older gear, you can try to sell it, or salvage the blackstones from it. Sadly, the number of Blackstones you get back are random-you are not guaranteed to get the same number back that you put into upgrading it in the first place.


Boss Armor
Boss armor will now drop from from the various bosses you can summon from Scrolls. These include Armor (Red Nose and Hebetate), Helm (Giath), Shoes (Muskan), and Gloves (Bheg).The various individual pieces can be combined into a set that scales incredibly well, making it one of the more powerful sets in the game. As the various pieces are rare and expensive, you will want to use Memory Fragments (acquired mainly through Relic Scrolls, and the new Forbidden book Scrolls) to repair your maximum durability lost to failed Blackstone Enhancements.


World Boss Kzarka
A brand new world boss on a 8-12 hour timer that spawns in the large sacrificial room in the Serendia Shrine (Southeast of Glish). This boss drops the famed Kzarka weapons which is a serious upgrade to your Yuria or Liverto Weapon. Be on the lookout for the server announcement that will notify you (about 6 seconds) just before Kzarka spawns, and make sure a sizable number of people have responded before attempting to engage the boss. His appearance is often a channel-wide event, with hundreds of players participating.


Forbidden Books
Similar to Relic shards, you will be able to collect 5 Forbidden Books dropped off mobs in Mediah and arrange them in a “V” formation in your inventory to create a scroll that will summon several waves of monsters to defeat, giving you another source of obtaining Memory Fragments and Seals.


Alchemy
You will now be able to craft Alchemy Stones, which come in three varieties; Destruction (which grant Accuracy, AP, Attack and Casting Speeds, and Ignore Armor), Protection( Damage Reduction, Evasion, Maximum Health, Resistances), and Life (Life skill buffs) to socket into your gear.


Heidal becomes more Important

As Mediah expands eastwards, Heidal becomes important as it makes a great starting point for linking your nodes. You may want to move your base of operations to Heidal once the expansion releases to allow easier access to the east.

Saturday, February 27, 2016

Horse Taming and Breeding Guide

In the World of Black Desert Online, if you want a decent mount, you are going to have to trek out into the world and tame one yourself. While you will receive a donkey at the end of the Velia quest line (donkeys actually have more base storage than a horse, which might make earlier trade runs easier until you can get a wagon), and can buy a starter horse from a merchant; you can find and tame horses in the wild all the way up to tier 5 (the first horse I tamed was tier 4). 

You can also made quite a bit of money by selling horses on the market. I know someone from CBT2 that made most of his fortune (1+ million Silver in the first day) just by going out and taming horses, then selling them on the horse market for profit.

What You Need
In order to tame a horse, your Taming skill must be at least level 5 (which you should get when your starter mount reaches about level 8). You will also need to purchase some lassos from a stable hand, costing 1500 Silver each. You are going to make mistakes in the beginning, so I suggest picking up at least 20 (or as many as you can afford). While not required, I also strongly suggest acquiring sugar lumps which will give you a boost in your efforts to domesticate your mount. These can be purchased directly from the auction house, but they are very easy to make via cooking. They only require 10 Raw Sugar and 1 Spring Water, which can be purchased directly from a tavern keeper for a little over 2000 Silver. I’d suggest making at least 3 for each mount you are going to tame.

Where to Find a Horse
Now you must set off into the world and find a horse to tame. I have found herds a short ways Southeast of Calpheon, Southwest of Heidel, and slightly East of the Northern Heidel Quarry. Once you find a horse in the wild, slowly approach to get close enough to throw a lasso. If you get too close, the horse will run away from you. If this happens simply wait for it to stop and approach it again (crouching will help you get closer). Be careful not to get the horse stuck on a rock or an incline, as you won’t be able to mount it later and all your efforts will have gone to waste.


Catching Your Horse
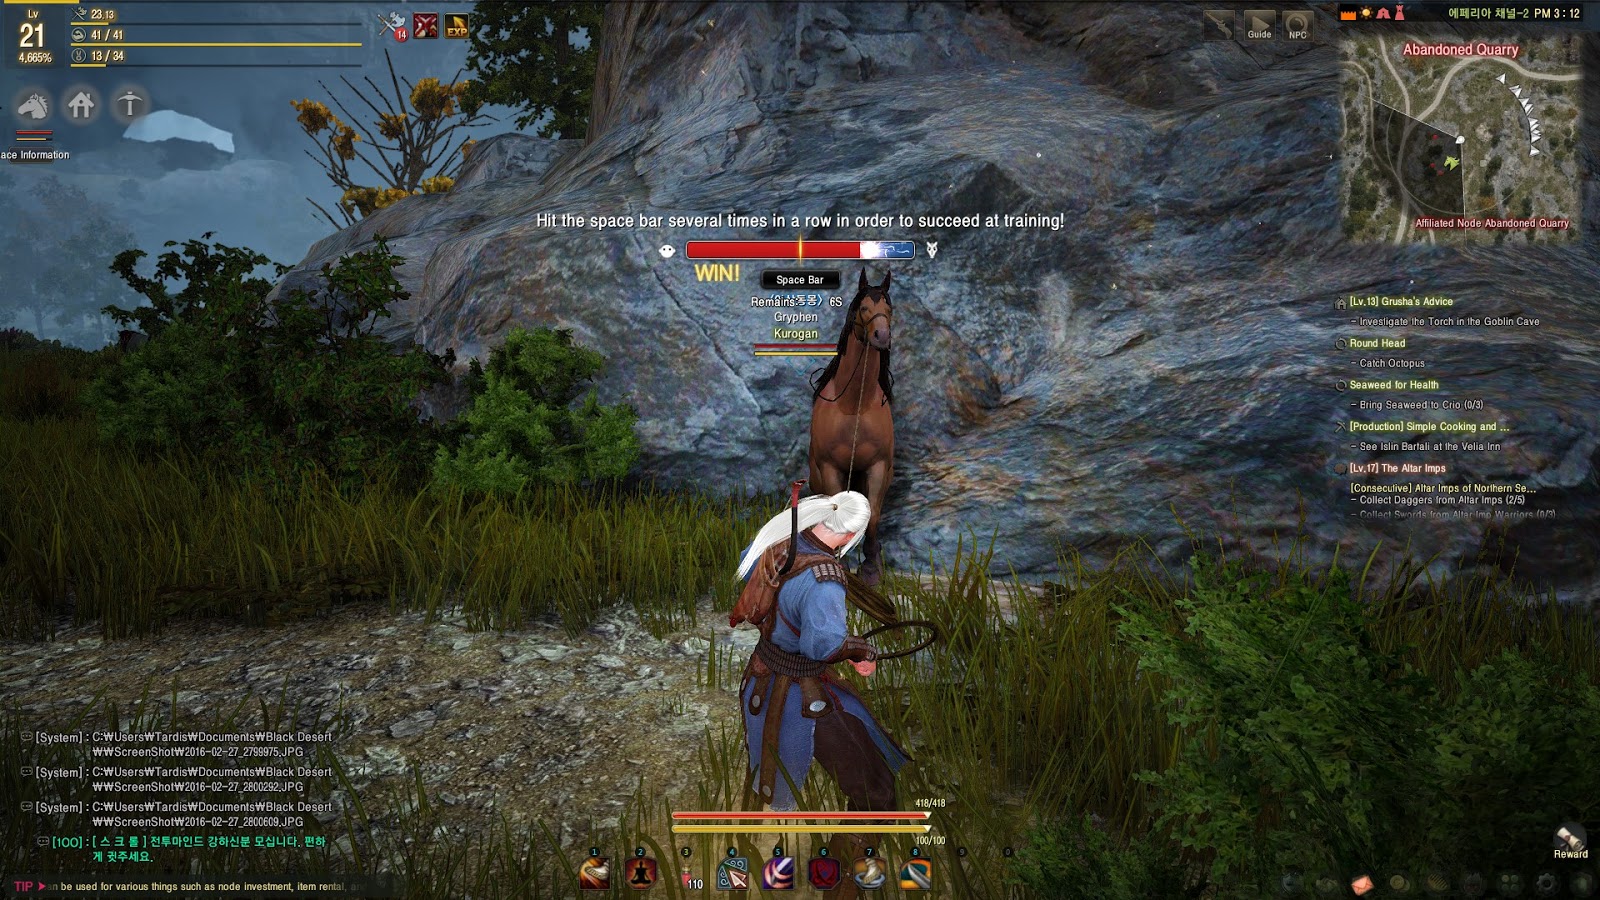
Once you have gotten close enough to the horse (the horse should have the red target on it), right click on the lasso on your inventory to throw it. Left click to throw the lasso, keeping the target on the horse, and a bar will appear. Hit the spacebar (make sure you don't try and hit left click again like I did) while you are in the sweet spot and the horse will become snared. Now you will be able to walk towards the horse slowly (you may want to wait a moment before attempting to approach the horse after it is lassoed as sometimes the horse will rear almost immediately). As soon as you see the horse rear up on its hind legs, press the spacebar. This will cause the second mini-game to start. While the minigame is active (there will be a countdown timer) spam your spacebar key as much as you can, keeping the meter to the right and in the blue. Once the timer expires, continue to move directly towards the horse. You may have to play the mini-game several times until you finally reach the horse.


Now, you can press “R” to attempt to mount, or press “F1” to give it a sugar lump. I recommend feeding the horse 3 lumps of sugar, then attempt to mount. If the horse doesn’t throw you, you will be able to guide it back to the nearest stable hand to register. If you are thrown you may be kicked and the horse will run off, and you will be forced to start again from scratch. Be careful not to attack the horse, as if you kill one, you will suffer a Karma hit. If you came upon the herd with a mount of your own, make sure you have left it in a safe area until you can return.

Once you get the horse to a stable hand, you will be able to register and name it. Oddly enough, you won’t be able to tell the sex of the mount until after it is named, so if you intend on using the mount regularly, you may wish to choose a gender neutral name.


Mount Breeding
In order to get horses of higher tiers, a male and a female horse of the same tier can be bred together (unlike pets, the horses are not consumed in the process) to create a new horse of a (hopefully) higher tier. To breed a pair, both will need to be at least level 10, although your chances of getting a higher tier horse increase with the level of its parents. You may also attempt to breed horses of varying tiers, trying to get a horse in between the two, or possibly (but unlikely) one of a higher tier.

To initiate breeding, check both mounts into the same stable and remove their gear. They also must both have full stamina. Register both your mounts for mating (a price must be entered for the male, but if you are breeding your own horses together you will get this money back). Then click the mating market and select your horses. You can also register your stallion for breeding, and collect the money the mare owner pays for the privilege of breeding with your stallion. Males can breed up to 2 times, while females can only be bred once. You can purchase breeding reset tokens from the cash shop, but they will only work with once with a given horse. The Female breeding reset costs 640 Pearls while the Male cost reset is 330.

It will take up to two hours for the process to complete and the foal to be born–which will actually be an already fully grown horse.


Thursday, February 18, 2016

Guide to Knowledge and Energy

Knowledge and Energy are incredibly important aspects of Black Desert Online. They are tied together because as you gain knowledge, your maximum Energy pool increases. This guide will explain to you the basic concepts of Knowledge and Energy, their uses and importance, and how to increase them.


Knowledge
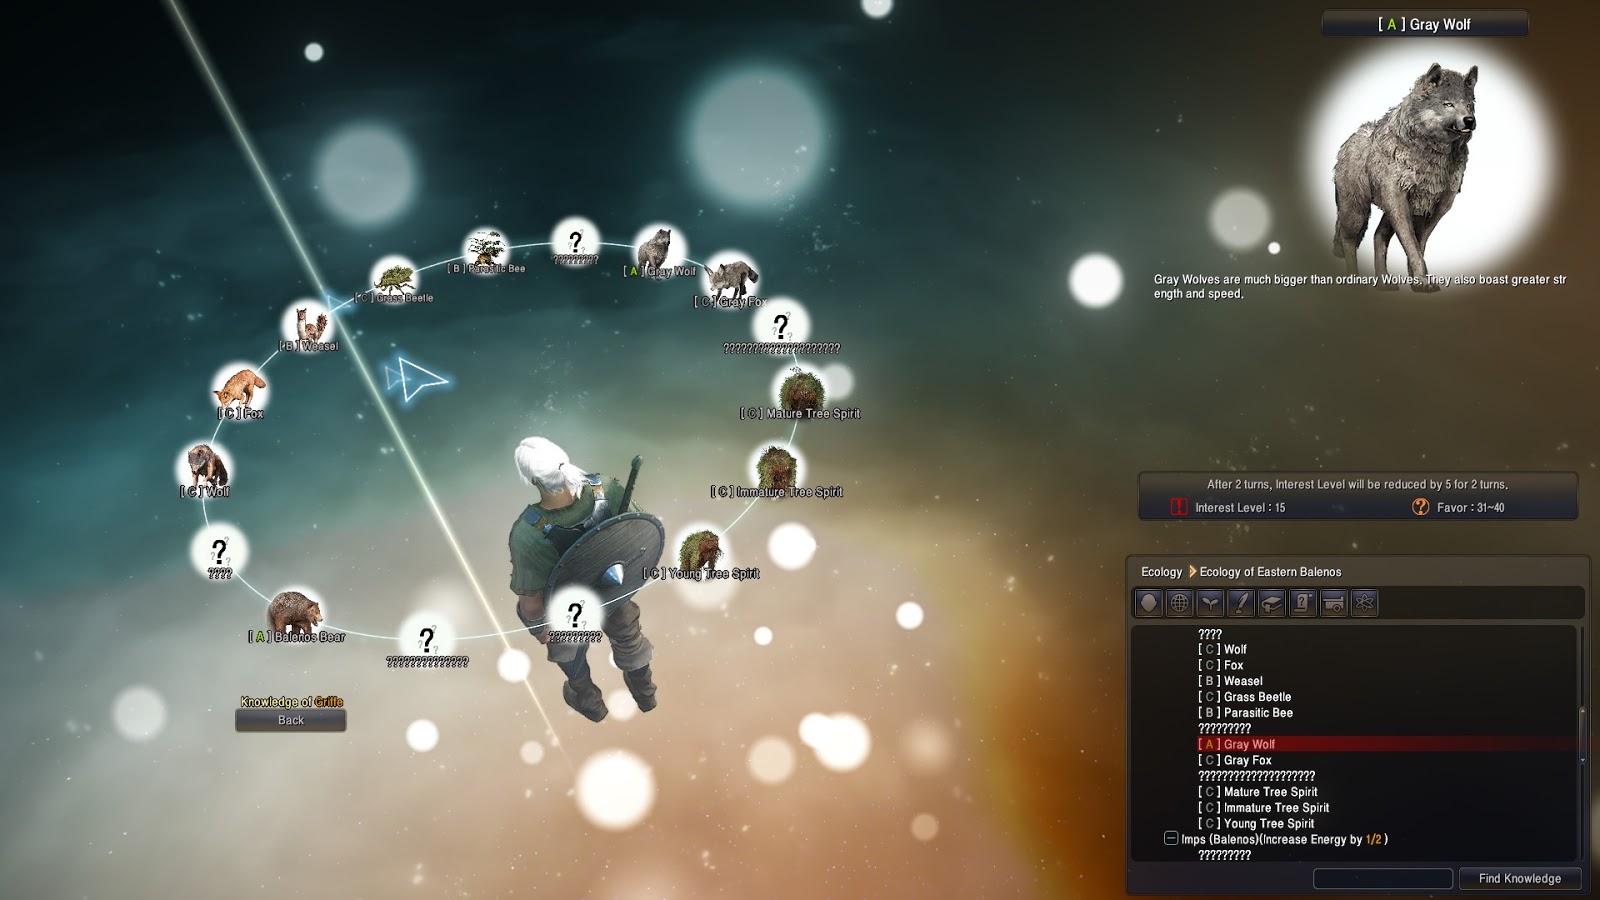
Knowledge represents information that you have learned throughout your travels in the World of Black Desert Online. Knowledge falls into different categories, including (but not limited to) knowledge of characters (NPCs), Topography, Resources, and Ecology (the knowledge of the beasts and creatures that inhabit the world). You will gain knowledge from meeting people, interacting with objects throughout the world, traveling, and killing monsters. You can access the knowledge interface at any time by pressing the “H” key in game.


Gaining Knowledge
Anytime you see a “?” on your minimap, go over to it and interact with who/what is there to gain knowledge about the subject. In addition, some NPCs will offer you knowledge through gossip by exchanging a small amount of energy, and some NPCs offer knowledge as a quest reward, or from reaching a high enough Amity with them by playing the Social Interaction minigame (this may also require a quest to perform first, but you will gain the knowledge once it is completed).


Knowledge can be obtained out in the world by interacting with interesting objects, such as statues, paintings, carvings, and wall murals. You can also gain knowledge by gathering resources. If you dig up enough potatoes, you will gain knowledge on them. As you fish, you will slowly gain the knowledge of the different types of fish you will catch.


Finally, knowledge is gained by slaying monsters. Ecology knowledge can take a while to gain, as you will normally need to kill a random number of mobs, and it is graded in 5 tiers from C to S. Depending on the grade you receive, you will receive bonuses when fighting these creatures in the future. Here is a list of the different ratings with their benefits (all benefits are cumulative):

C
See the creatures full health bar
B
Defense bonus against the creature
A
Attack bonus against the creature
A+
Larger attack bonus
S
Increased chance of dropping loot


When you gain rated knowledge, its value is completely random and is not based on criticals, number of mobs grinded out, or any other factors. The good thing is, if you are unhappy with your result, you can go to the Librarian in Calpheon to reset it. As this can be somewhat inconvenient when you are grinding, I suggest keeping an NPC logged near the librarian that you can hop over to so you can quickly reset the knowledge of the creature you want to get a higher score on. I wouldn’t worry too much about having a good rating until you are fighting level 50+ creatures where you will benefit the most from the higher grade.


Energy
Energy is a resource that is expended temporarily to do many things in the game, including social interaction (that includes speaking in channel chat–which is BTW a great way to keep spammers out of it), gathering and processing resources, investing in nodes, and hiring workers. Your energy maximum is account based (as it is tied to knowledge, which is also account based), but each character keeps their own energy total. This means that if you do not have enough energy to complete a task on your main character, you can always log onto an alt to spend his energy.


Speaking with NPCs
When interacting with an NPC you can gain Affinity with, you can press F1 to exchange 3 Energy for 3 Amity. You can also pay an amount of energy listed to the left of the conversation button (the right side is your maximum energy), to play the Social mini-game. If you meet the requirements in a round (top right of screen), you will be able to play again, and if the requirements are met again, a third time. If you are successful, you will increase your Amity with the NPC by a substantial amount (hopefully). You will need to possess sufficient knowledge that the NPC is interested in to attempt the Social minigame.


When you speak to the NPC and you don’t have the prerequisites, they will tell you what interests them and how many additional pieces of knowledge you will need to gain in order to interact with them. As an example, one NPC might be interested in the merchants in a particular town, while another might like talking about different types of fish. We are writing a Social Interaction guide that will explain more on how to play the minigame, which should be out prior to the game’s Western release.


Node Investment
You can spend your energy to invest in a node you have already invested Contribution in. You must invest 10 energy at a time, which will slowly increase the node’s level, to a maximum of 5. As you gain levels of node investment, you will need more energy to increase its rank to the next level, and so on. The higher you have ranked up a node the more benefits you will reap from it, including increases to materials harvested by your workers and to drops gained while farming mobs nearby. If you are ever near your energy cap and don’t know what to do to spend it, I suggest spending 10 points into a node that is valuable to you. As a warning, if you release the node to regain the Contribution and then reinvest it back later, your previous energy investment is lost (the node resets to level 1).


Gathering and Processing Resources
You will spend a small amount of energy each time you gather or process (a change from the Korean version) a resource yourself. You will also spend a small amount of energy when crafting food and potions at your residence crafting stations (another change from the Korean version of the game).


Energy Regeneration
Energy regenerates naturally at the rate of 1 point every three minutes your character is logged into the server, and 1 point every hour he is not. Therefore if you play your main for 6 hours straight, each alt will regenerate 6 points of energy during this time (Pro tip: Make your alts early on, you can always delete them later and create another character). In addition many quests, including dailies will as a reward regenerate a certain amount of energy (make sure your energy is not capped before you select the reward). If you are at your residence, sleeping in your bed will recover additional energy. A crafted bed restores 1 point of energy every 2 minutes, while a bed purchased in the cash shop will regenerate 1 point per minute sleeping in it.


You can also create potions of energy by draining your own. Currently, the tradeoff is that you must spend 100 energy to make a potion yielding 10 energy, which can then be sold on the Auction house. These numbers are currently under review at Daum, and could change to a more favorable value (hopefully) in the future.


Increasing your Energy
Your energy maximum will increase as you gain knowledge in specific categories. The total amount of energy can vary per category, depending on how large it is. I suggest occasionally pressing “H” to open the knowledge interface to access the categories, which will not only tell you your learned knowledge but also what must be sought out to further increase your energy total. Gain the missing knowledge in the category and increase the cap.

Tuesday, February 16, 2016

Guide to Fishing


Fishing is an excellent way to make money in Black Desert Online. Not only can you actively fish, which involves a mini-game that can be quite addictive (trust me, I know), you can also fish while AFK to make good money when you need to be doing real life things (i.e. sleeping or working). That’s right, in Black Desert Online, you can stay logged into the game 24/7, and the game will actually reward you for doing so. In addition, you earn experience towards increasing your character level while fishing, although grinding mobs will certainly level you faster.


You can fish just about anywhere in the world that has an abundance of water, such as a river, lake or ocean. Popular areas will tend to get overfished, which will increase the amount of time it takes to hook one. You can also build or buy a boat and go out into deeper waters for even better catches, but as a beginner it probably best to stay on the shore and increase your fishing skill for a while as you learn the system.


Fishing Rods and Bait
In order to fish, you will first need to get a fishing rod. You can either get one as a quest reward, or simply speak directly to Crio in Velia (he is by the docks, and also gives you the Hunting daily). He will sell you a rod for 500 Silver and also has fishing daily quests to offer. The rod has a durability of 30, which should last you between half an hour and an hour of fishing, depending on whether you are playing the mini-game or AFK fishing (AFK fishing takes longer so you will lose durability at a slower pace).


Rods cannot be repaired (none of the tools can), but you can craft your own at a tool Workshop that is more sturdy and provides other benefits, such as increasing your chance of catching rarer fish.


You can exchange 5 fishing tokens at a Fishing Shop NPC to purchase bait that will give your fishing skill different buffs, such as decreasing the amount of time it takes to hook a fish, or increasing the chance of catching rarer fish. You can earn fishing tokens by exchanging common fish for them. You can also find bait for sale in the Mileage Shop (Mileage is earned as a daily login reward). While not required, bait can help the dedicated fisherman greatly improve his profits.


Fishing
To play the minigame, you must first equip your fishing rod, then cast it into the water by pressing the spacebar. The amount of time it will take to hook a fish is based upon how depleted the spot is. Typically, areas close to the dock can become exhausted very quickly, so if you are starting to fish in Velia, move West along the coast until you can find a spot where the fish are abundant. Be careful if you go to into a combat zone if you are level 30 or above, especially if you are AFK fishing, as you could get killed by another player.


Once your line is cast, you will need to wait until you get a bite. When this happens, you will see an icon of a fish appear on screen. Press the spacebar to start the mini-game.


A bar will appear with the left side in red and the right side  in blue.  The bar fills from left to right and then empties. The goal is to hit the spacebar while in the blue (the bar will fill from left to right 3 times before cancelling and forcing you to recast your line). If you manage to hit it at the end of the blue portion of the bar you will automatically win. If you don’t (don’t worry, it doesn’t happen often), you will need to press a combination of WASD keys, the number based upon how rare the catch is. If you do this before time runs out, congratulations, you have have won and may loot your catch by pressing “R”.


If you just want to AFK fish, simply cast your line using the spacebar, and let the game do the rest. You will notice that it will take a while for your character to react to the fish icon that appears on screen, which is why AFK fishing is slower than you immediately hitting spacebar once you see the icon. I typically Alt Tab back into the program once in awhile when AFK fishing and if I have a bite play the mini-game, but if you want to leave your character AFK for hours, as long as your rods durability holds and your inventory doesn’t fill up, you will continually fish. Near the top of your screen you have the option of checking a box that will discard low quality items. I suggest enabling this if you are going to be away for awhile.


What to do with your Catch?
If you have caught a fish, you can take it to the nearest Trade Manager to sell (in Velia, he is near the Northern Stables). If you did not catch the fish locally, you must have all the nodes from where it was caught to the town where the Trade Manager is located linked or you will only receive 30% of the trade value (that’s bad). You also have a limited amount of time to sell a fish once caught (around 24 hours) or it will spoil. Alternatively, you can “dry” a fish, which will reduce its value, but will remove the expiration timer. Your fish might be more valuable to you as a crafting ingredient, in which case you can keep it and use it in a recipe.

In addition to fish, you can also acquire other items which can either be sold on the Auction house, or kept for personal use. Some of the rarer items include keys allow you to open chests that you come across exploring the world. You will also come across Ancient Relic Fragments that can be combined (place 5 of them into a + formation in your inventory) into a Boss Summoning Scroll (with a 7 day expiration timer, so don’t create it if you aren’t planning on using it in the next week).

Monday, February 15, 2016

Contribution Guide

Contribution represents influence you have gained by assisting people throughout the world of Black Desert Online. It is a new concept not seen in previous MMO’s and therefore can be somewhat confusing to beginners. The aim of this guide is to teach you the basics of the system, including how to earn and invest contribution.

We originally intended on having separate guides on Housing, Nodes, and Workers, but as we prepared our outlines we realized that they were all so intertwined that it would be better to create a single larger guide to talk about Contribution and its uses. Because of this, the guide is a little on the long side, but we believe the information will be very useful to players, especially those new to the game.

What is Contribution?
Contribution is a resource gained by performing quests for the NPCs of Black Desert Online. This resource is shared among all of your characters, and all Contribution experience earned goes to increasing your account’s Contribution level. This means that even while you are leveling an alt, any Contribution quests completed by the character will help to raise your contribution total. This includes Storyline quests.

Contribution is invested, but never lost. You may always give up the resource you have traded your Contribution for and it will be returned immediately to your account. You may invest your Contribution into a number of things, including: Item Rental, Housing, Workers, and Resource Nodes. Typically Contribution cannot be invested remotely–you must visit the location in order to secure the resource in question.

Item Rental
You may rent items from NPC’s throughout the world by investing Contribution. This can include things such as Weapons, Armor, and Furniture (including a chest that will allow you to access your warehouse). Certain NPCs may require a certain level of Affinity (see our guide on Conversations and Affinity) to allow you to rent an item (I don’t know about you–but I would not lend out my favorite slippers to just anyone).

The great thing about item rentals is that once the item is of no more use to you, you can simply return it and immediately reclaim your Contribution. It’s like letting your friend borrow a book, you aren’t going to charge him for it (I hope), and when he is done with it he brings it back to you.

Early on, I recommend renting the hunting rifle from Laiano the Guild merchant in Velia to get a jump on the hunting quests, until you can make or purchase your own. Once acquired, speak to Crio (Also in Velia, by the docks) to get the hunting quest to kill Seagulls (you must have the rifle to get the quest-if it is not available, press “O” and set quest preference to “all”), then return the gun. There is no need to keep a rented item in your inventory if you aren’t going to use it–it’s just taking up space. You can return again the next day to rent again to do the quest.


Housing
Houses are gained through investing Contribution (although some buildings may also have a Silver cost as well). While in most MMOs Housing provides a place to decorate and perhaps extra storage, in Black Desert Online it plays a huge role in the crafting and production aspect of the game.

You buy houses in cities, towns, some villages, and even some remote places throughout the world. You can see if any housing is available by left clicking the location on the world map. Housing must be bought in tiers, with any blue houses displayed on the map being available for immediate purchase (houses must also be sold back from highest to lowest tier as well). Houses showing up in grey on the map  have a prerequisite house that must be purchased first (look for lines linking the two properties). You can also tell the houses that are purchasable by the purple beacon on the doormat. Some houses can be upgraded further, which will also take time to complete. The arrows next to the type of the house indicate how many times the house can be upgraded. There are four types of houses; Residences, Lodging, Storage, Work Stations.


Just about any house can be turned into a Residence, and you are limited to 5 per account. Residences are the only buildings that you can enter and decorate. Furniture can be placed in the house by clicking the editor icon on the upper left hand side of the screen, which will open the House Editor and allow you to decorate. Furniture provides bonuses to your character, including energy regeneration. Also, there are some crafting stations that can be placed into a house, such as an Alchemy or Cooking workstation.

Lodging increases the number of worker’s you can hire (see below). While the first worker you receive does not require lodging (my guess is that he is local), each additional worker will require a place to sleep if you want him to enter your service. Lodging can be upgraded to provide more beds and house more workers.

A Warehouse will increase your personal storage, which is accessed through the Storage Manager in any town, or if you have rented a storage container from the manager, in your house as well. Upgrading Warehouses increases the number of inventory slots available. It is important to note that all inventory is localized. Therefore, if you leave a stack of materials and later need to access them in Heidel, you will need to return to claim them. You can view your inventory remotely however by clicking on the the city, which will pop up the storage screen (provided you have selected the appropriate viewing mode on the world map).

Your Warehouse is where your workers will store items that they have harvested for you and where they will draw items from while crafting. Any items crafted will also be deposited there. Be careful to leave some space, or your Workers will stop harvesting resources and crafting once it fills.

Workshops allow you set up production to craft items using your workers. Different houses allow for different types of crafting stations, i.e. you cannot take any house and decide to make it a  shipyard. Because of this, be careful which house you assign to a specific purpose, as the house you turned into a Warehouse might have been the only place you could create a carriage workshop in the town.

Node Management
Nodes represent valuable resource gathering areas on other various points of interest throughout the world. By investing in a node, you can tap into those resources. Nodes must be linked together back to their settlement to be used, simply investing in a node is not enough.

Nodes can be used for production by sending off a worker after the node and the resource have been invested in, for trade, by linking towns together to secure a trade route that greatly increases the value of your goods (trading to an unlinked city only rewards 30% of the value), and even for grinding mobs, as the drops will be better in an area linked together from nodes you control.

You can invest in a node by speaking with the Node Manager NPC, who is usually, but not always present at the node in question (look for the node manager nearby on the world map if he or she is not present at the node). Remember that if you are harvesting resources, you will also need to spend Contribution points on each resource you want to harvest in addition to investing in the node (again, via the Node Manager).

Worker Investment
Workers can be used to gather and refine resources, and also to craft items for your character. There are three types of workers; the quick working but low strength Goblins, the slow moving but high strength Giants, and the Humans, which represent a balance between the two. Speed indicates how quickly the worker will complete its task, while Strength determines how long he can be worked without being refreshed with beer (see below). Workers are divided into 5 Tiers; Grey, Green, Blue, Yellow and Orange, with Grey being the weakest and Orange being the strongest.

Workers gain experience and levels while being assigned tasks and will receive new skills when they do so. These skills give bonuses to doing things, such as gathering faster or crafting a higher quality item.

You may send your worker to take an exam every ten levels. Only one Worker can be sent at a time, which takes 24 hours to complete (and also makes the worker unavailable for the duration). If successful, they will evolve to the next higher tier (Green to Blue).

You may hire a worker by going to the Work Commissioner NPC. You will need to Spend 5 energy to evaluate a worker. For the first few workers you hire, I would take any that are green quality or higher. Later on, you can become more discriminating. There is also a Worker Market where you can buy or sell Workers as you wish. An opportunity exists to make some Silver simply by developing Workers and then offering them for sale to those that don’t have the patience to do it themselves.

To manage your workers, simply click on the pickaxe on the upper left hand side of the screen and tell them what you want them to do.

In addition to securing lodging for your workers, you will also have to keep them refreshed. This is accomplished by giving them beer. Beer can either be purchased from the Auction House or made at your Residence if you have put in a cooking station (you can buy one at a Tavern), plus the following ingredients (certain ingredients can be substituted, such as grains instead of potatoes, or gathered in the world, such as water-this is fastest for a new player):

  • 5 Potatoes (Bartali Farm)
  • 2 Fermentor (Tavern Keeper)
  • 1 Sugar (Tavern Keeper)
  • 6 Water (Tavern Keeper)

You may send your Workers to the farm to gather the potatoes, or you can buy a hoe from the tool vendor in Velia and harvest them yourself, at the cost of energy.


Once you have brewed or purchased your beer, click on the pickaxe to open the worker menu and click recover on the Worker you want to give the beer to.

Monday, February 8, 2016

Guide to Guilds in Black Desert


Guilds in Black Desert Online work very differently than any other MMO I have ever played before. The concepts they have introduced are very refreshing and promote players banding together for a common cause. In this guide I am going to cover the basics on how guilds work, including how to create and manage a guild. Please keep in mind that this guide was created using the Korean version for the game model (with the most recent Beta Patch notes and our own Beta 1 experience). As there will be some changes between now and launch, some of this information may become outdated at game release. Here at Black Desert Blog our aim is to keep our guides as up to date as possible, so as things change we will endeavour to do our best to keep the guide up to date. Also, this guide does not include sieging. To cover sieges properly would require a guide at least this size, if not larger, and there is talk of more changes coming to the siege mechanics before launch. We are working on the guide, and hope to release it in the not too distant future.

Starting a Guild
To start a guild you will need to pay 100,000 Silver and will need to speak to a Guild Manager located in any major city. As an alternative, you may start off by creating a Clan by speaking to the same NPC at any level for free. A Clan is essentially a mini-guild restricted to 15 members. You won’t be able to claim territory or gain guild experience, and you are restricted to a total of 15 members, but you can promote it later to a guild once you have enough Silver. You will retain the clan name when you reform as a guild. Note that should you upgrade your clan into a guild, you will need to assign a contract to each of the members (see below).

Guilds have a hard cap of 100 members. In addition, as guilds get larger and more powerful, they will need to pay upkeep on a daily basis. Failure to pay this will reduce some of the privileges a guild enjoys.

Members
Upkeep Free
15
0
30
0
50
100,000
75
250,000
100
500,000

Contracts
The money spent to create a guild isn’t actually lost, rather it is deposited into an account from which salaries are drawn. That’s right, as a member of a guild you will receive a contract lasting up to a month that dictates the amount the guild will pay you for being a member. This amount can be modified by the Guild Master once a day. A member can leave a guild before their contract expires, but must pay a penalty to do so. A member can be kicked by the Guild Master, but must be paid 3 days severance in return. In either event once you leave a guild, you must wait 24 hours before joining another one. All contracts must be signed in person, but can be modified anywhere.

If a member’s contract expires he is not automatically kicked from the guild, but he no longer longer receives a salary and loses access to any of the guild perks (see Guild Skills) possessed by the guild. A member that is without a contract is free to leave at any time and pays no penalty to do so.

Rank and Privileges
Guilds in Black Desert have 3 ranks. Guild Master, Officer, and Member. Here is a breakdown of what each can do:

Guild Master
  • Creating or changing the Guild Icon
  • Declare and Revoke Wars
  • Accept and Complete Guild Quests
  • Purchase Guild Skills
  • Use the Guild Store
  • Invite members to the Guild
  • Adjust Member Contracts
  • Dissolve the Guild

Officers
  • Accept and Complete Guild Missions
  • Use the Guild Store
  • Invite members to the Guild.

Members
  • No Privileges

A Guild Master has a lot of work cut out for him, especially if he or she is interested in running a larger guild. You will need to be dedicated to your guild in order for it to flourish. While officers can help, most of the power is vested to the leader and he or she will need to be constantly active to properly manage the guild. Expect a fair amount of micro-managing to be sucessful.

A final thing to note is that a Guild Master can use his own funds to prop up a guild in financial difficulty, but cannot withdraw funds from the guild’s account, so if you join a guild and put a lot of effort in, the GM cannot simply take off with all the money.

Guild Emblem
The Guild Master can create a custom logo to represent his guild. The logo must be 60x60 pixels saved in .png format and named gmark.png. Put the file in your Documents/Black Desert folder. You will need to purchase a “Guild Emblem Token”. Once the token is in your inventory press “G” and click apply Guild Emblem.

Guild Quests
Guild quests are missions that can be selected by either the Guild Master or an Officer which can be completed by the membership. They are broken into four categories; Combat Quests, Gathering Quests, Crafting Quests, and Trading Quests.

The guild will earn the Silver and Guild experience provided the quest is completed before it expires.

Guild Skills
Every time a guild member earns Contribution experience, the guild earns experience as well. As the guild levels the Guildmaster will be able to invest points into unlocking benefits that each member of the guild with an active contract can enjoy. Skills are divided into four categories (similar to quests); Combat, Gathering, Crafting, and Trade.

Some skills are passive and automatically apply their benefits once unlocked. Others require the use of a consumable item known as a “Blood Oath”, which can be purchased by the Guild Master from the Guild Store.

Territory Ownership and Guild Halls
Guilds can earn quite a bit of money and other resources through territory ownership. A subsidy is granted for nodes and regions under guild control, as well as a cut of the trade going through a region’s auction house. This can all add up to quite a bit of money. Territory ownership plays a huge part of the endgame experience in Black Desert, and we will be devoting a guide to it in the near future.

Guilds can also rent guild halls. These are found in city capitals. These are houses that require Silver rather than Contribution Points, with only a limited number being available. Only a Guild Master can bid on them, and the money comes from the guild’s funds. A guild house can be used for a variety of purposes, including the ability to raise and train War Elephants!

Guild Wars
The Guild Master of a guild may declare war on on another guild by spending 150,000 Silver. You may be engaged in eight separate wars at the same time. Once the war starts you will suffer no penalties for killing a member of the opposing guild. A Guild Master can declare up to 10 members as non-combatants, which can be increased to 20 by spending skill points. This status cannot be revoked until at least 24 hours have past. Neither a Guild Master, or his officers can be become non-combatants.

Special thanks to Otoudan for his assistance in the creation of this guide.

 
Back To Top
Copyright © 2015 Black Desert Blog.
Designed by OddThemesstyle="visibility: hidden"