

Contribution represents influence you have gained by assisting people throughout the world of Black Desert Online. It is a new concept not seen in previous MMO’s and therefore can be somewhat confusing to beginners. The aim of this guide is to teach you the basics of the system, including how to earn and invest contribution.
We originally intended on having separate guides on Housing, Nodes, and Workers, but as we prepared our outlines we realized that they were all so intertwined that it would be better to create a single larger guide to talk about Contribution and its uses. Because of this, the guide is a little on the long side, but we believe the information will be very useful to players, especially those new to the game.
What is Contribution?
Contribution is a resource gained by performing quests for the NPCs of Black Desert Online. This resource is shared among all of your characters, and all Contribution experience earned goes to increasing your account’s Contribution level. This means that even while you are leveling an alt, any Contribution quests completed by the character will help to raise your contribution total. This includes Storyline quests.
Contribution is invested, but never lost. You may always give up the resource you have traded your Contribution for and it will be returned immediately to your account. You may invest your Contribution into a number of things, including: Item Rental, Housing, Workers, and Resource Nodes. Typically Contribution cannot be invested remotely–you must visit the location in order to secure the resource in question.
Item Rental
You may rent items from NPC’s throughout the world by investing Contribution. This can include things such as Weapons, Armor, and Furniture (including a chest that will allow you to access your warehouse). Certain NPCs may require a certain level of Affinity (see our guide on Conversations and Affinity) to allow you to rent an item (I don’t know about you–but I would not lend out my favorite slippers to just anyone).
The great thing about item rentals is that once the item is of no more use to you, you can simply return it and immediately reclaim your Contribution. It’s like letting your friend borrow a book, you aren’t going to charge him for it (I hope), and when he is done with it he brings it back to you.
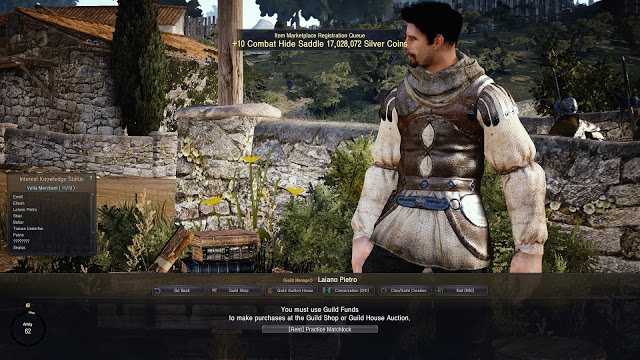
Early on, I recommend renting the hunting rifle from Laiano the Guild merchant in Velia to get a jump on the hunting quests, until you can make or purchase your own. Once acquired, speak to Crio (Also in Velia, by the docks) to get the hunting quest to kill Seagulls (you must have the rifle to get the quest-if it is not available, press “O” and set quest preference to “all”), then return the gun. There is no need to keep a rented item in your inventory if you aren’t going to use it–it’s just taking up space. You can return again the next day to rent again to do the quest.
Housing
Houses are gained through investing Contribution (although some buildings may also have a Silver cost as well). While in most MMOs Housing provides a place to decorate and perhaps extra storage, in Black Desert Online it plays a huge role in the crafting and production aspect of the game.
You buy houses in cities, towns, some villages, and even some remote places throughout the world. You can see if any housing is available by left clicking the location on the world map. Housing must be bought in tiers, with any blue houses displayed on the map being available for immediate purchase (houses must also be sold back from highest to lowest tier as well). Houses showing up in grey on the map have a prerequisite house that must be purchased first (look for lines linking the two properties). You can also tell the houses that are purchasable by the purple beacon on the doormat. Some houses can be upgraded further, which will also take time to complete. The arrows next to the type of the house indicate how many times the house can be upgraded. There are four types of houses; Residences, Lodging, Storage, Work Stations.

Just about any house can be turned into a Residence, and you are limited to 5 per account. Residences are the only buildings that you can enter and decorate. Furniture can be placed in the house by clicking the editor icon on the upper left hand side of the screen, which will open the House Editor and allow you to decorate. Furniture provides bonuses to your character, including energy regeneration. Also, there are some crafting stations that can be placed into a house, such as an Alchemy or Cooking workstation.
Lodging increases the number of worker’s you can hire (see below). While the first worker you receive does not require lodging (my guess is that he is local), each additional worker will require a place to sleep if you want him to enter your service. Lodging can be upgraded to provide more beds and house more workers.
A Warehouse will increase your personal storage, which is accessed through the Storage Manager in any town, or if you have rented a storage container from the manager, in your house as well. Upgrading Warehouses increases the number of inventory slots available. It is important to note that all inventory is localized. Therefore, if you leave a stack of materials and later need to access them in Heidel, you will need to return to claim them. You can view your inventory remotely however by clicking on the the city, which will pop up the storage screen (provided you have selected the appropriate viewing mode on the world map).
Your Warehouse is where your workers will store items that they have harvested for you and where they will draw items from while crafting. Any items crafted will also be deposited there. Be careful to leave some space, or your Workers will stop harvesting resources and crafting once it fills.
Workshops allow you set up production to craft items using your workers. Different houses allow for different types of crafting stations, i.e. you cannot take any house and decide to make it a shipyard. Because of this, be careful which house you assign to a specific purpose, as the house you turned into a Warehouse might have been the only place you could create a carriage workshop in the town.
Node Management
Nodes represent valuable resource gathering areas on other various points of interest throughout the world. By investing in a node, you can tap into those resources. Nodes must be linked together back to their settlement to be used, simply investing in a node is not enough.
Nodes can be used for production by sending off a worker after the node and the resource have been invested in, for trade, by linking towns together to secure a trade route that greatly increases the value of your goods (trading to an unlinked city only rewards 30% of the value), and even for grinding mobs, as the drops will be better in an area linked together from nodes you control.
You can invest in a node by speaking with the Node Manager NPC, who is usually, but not always present at the node in question (look for the node manager nearby on the world map if he or she is not present at the node). Remember that if you are harvesting resources, you will also need to spend Contribution points on each resource you want to harvest in addition to investing in the node (again, via the Node Manager).
Worker Investment
Workers can be used to gather and refine resources, and also to craft items for your character. There are three types of workers; the quick working but low strength Goblins, the slow moving but high strength Giants, and the Humans, which represent a balance between the two. Speed indicates how quickly the worker will complete its task, while Strength determines how long he can be worked without being refreshed with beer (see below). Workers are divided into 5 Tiers; Grey, Green, Blue, Yellow and Orange, with Grey being the weakest and Orange being the strongest.
Workers gain experience and levels while being assigned tasks and will receive new skills when they do so. These skills give bonuses to doing things, such as gathering faster or crafting a higher quality item.
You may send your worker to take an exam every ten levels. Only one Worker can be sent at a time, which takes 24 hours to complete (and also makes the worker unavailable for the duration). If successful, they will evolve to the next higher tier (Green to Blue).
You may hire a worker by going to the Work Commissioner NPC. You will need to Spend 5 energy to evaluate a worker. For the first few workers you hire, I would take any that are green quality or higher. Later on, you can become more discriminating. There is also a Worker Market where you can buy or sell Workers as you wish. An opportunity exists to make some Silver simply by developing Workers and then offering them for sale to those that don’t have the patience to do it themselves.
To manage your workers, simply click on the pickaxe on the upper left hand side of the screen and tell them what you want them to do.
In addition to securing lodging for your workers, you will also have to keep them refreshed. This is accomplished by giving them beer. Beer can either be purchased from the Auction House or made at your Residence if you have put in a cooking station (you can buy one at a Tavern), plus the following ingredients (certain ingredients can be substituted, such as grains instead of potatoes, or gathered in the world, such as water-this is fastest for a new player):
- 5 Potatoes (Bartali Farm)
- 2 Fermentor (Tavern Keeper)
- 1 Sugar (Tavern Keeper)
- 6 Water (Tavern Keeper)
You may send your Workers to the farm to gather the potatoes, or you can buy a hoe from the tool vendor in Velia and harvest them yourself, at the cost of energy.
Once you have brewed or purchased your beer, click on the pickaxe to open the worker menu and click recover on the Worker you want to give the beer to.


Post a Comment